Binding Inserts - What's the Point and How do I Install Them?

Skis are like tires for your car. Different skis are designed for different conditions. You can go the ‘all season tires’ approach and have a jack of all trades ski, but anyone who’s driven ‘all season’ tires in the winter knows that ‘all season’ is a euphemism for ‘lousy at most things’.
A way better solution for tires is to have conditions specific tires. Nice fuel efficient and quiet tires for the summer (or semi-slick performance tires if that’s your thing) and a heavily siped, blocky tread winter tire for getting out to the mountains on snowy roads.
The best part is, the conditions specific tire approach doesn’t even really cost any more than all seasons – your tires last twice as long when you only use them half the year. You get better performance, for the same cost.
Skis are the same way – yet most people only own a single pair.
In my experience, a normal set of backcountry skis is generally good for one to two hundred days of use before the cores start getting super floppy. Light skis don’t last as long as heavy skis due to the way more delicate wood used in their cores.
So, if you replace your skis every hundred days, that’s good for around two seasons of ‘Phil’ level use. If you have two sets though, then you take twice as long to hit that replacement point.
Personally, I have three or four sets of skis on the go at a time. I have my rock skis (a miled-out set of old skis I can destroy without feeling badly), I have my lightweight setup that’s a little narrower and can be used for either low-powder situations or traverses where weight matters and I have my full blown mid-season-puke-fest setup which are huge, a little heavier but float amazingly.
Because no one set is being used all of the time, EVERYTHING is getting used for a longer period of time. I get the right ski for the job, but my cost-per-ski-day is the same as if I had a single set of skis.
The problem though, is that this has historically meant that I had three sets of basically the same bindings. Currently, I have two sets of Dynafit Radicals and a set of Dynafit Verticals which is basically the same thing. That seems like a waste to me. Unlike the skis – where each set serves a different purpose, the bindings are just duplicates and don’t wear out the same way skis do.
When I bought a new set of skis this year, I decided to fix this problem once and for all.
I reached out to Binding Freedom and got a bunch of their binding inserts. If the concept of binding inserts is new to you, here’s the deal.
The idea is that you mount these metal inserts into your ski following the mounting pattern of your bindings. You then attach your bindings to the inserts. There are two advantages here – one is durability. I have problems with my toe-pieces coming loose over time. The inserts increase the interface area with the ski, so they should make things stronger. The other advantage is that when I want to swap between two different skis setups, I just unscrew the bindings from one and move them to the other. The metal-on-metal interface of screws and inserts lets you do this with no damage to your skis. Five minutes with a screw driver and you’ve moved your setup.
Genius.
Now, the only problem is installation – not all shops will install inserts and those that do tend to want a silly amount of money for it. So instead of paying a shop to do it, I went around to my buddy Kyle’s shop and used his tools and expertise to do it ourselves.
So that’s why I installed inserts, now I’ll tell you how we installed them.
Usual disclaimer of this is only how I installed these inserts. This is NOT me telling you how YOU should install them. When in doubt, consult Binding Freedom or have you favourite local shop help you out. Screwing this up could result in injury, so if you aren't confident in what you are doing, pay a few bucks to have a professional do this for you. Practising on a scrap 2x4 a few times is probably a really good idea.
Equipment:
The inserts. Unless you are just starting out, you probably want enough for two sets of skis. Make sure to degrease these before you install them.
- Screws - You want screws that have the right thread for the inserts and are the right length for your bindings. The good folks at Binding Freedom have a section of their website to helping you figure out what you need.
- Scissors
- Drill
- Epoxy (T-88)
- LocTite (425)
- Pencil/Marking thing
- Hammer
- Square (actual or home-made out of a ruler and tape)
- Punch
- Normal ski mounting bit (3.5 or 4.1mm x up to 9.5mm)
- Binding insert mounting bit (6.5 x 9.5mm)
- Deburring tool
- Degreaser
- Tap
- Insert installation tool or pozi drive bit
- Template for your binding - printed off to scale.
- Beer.
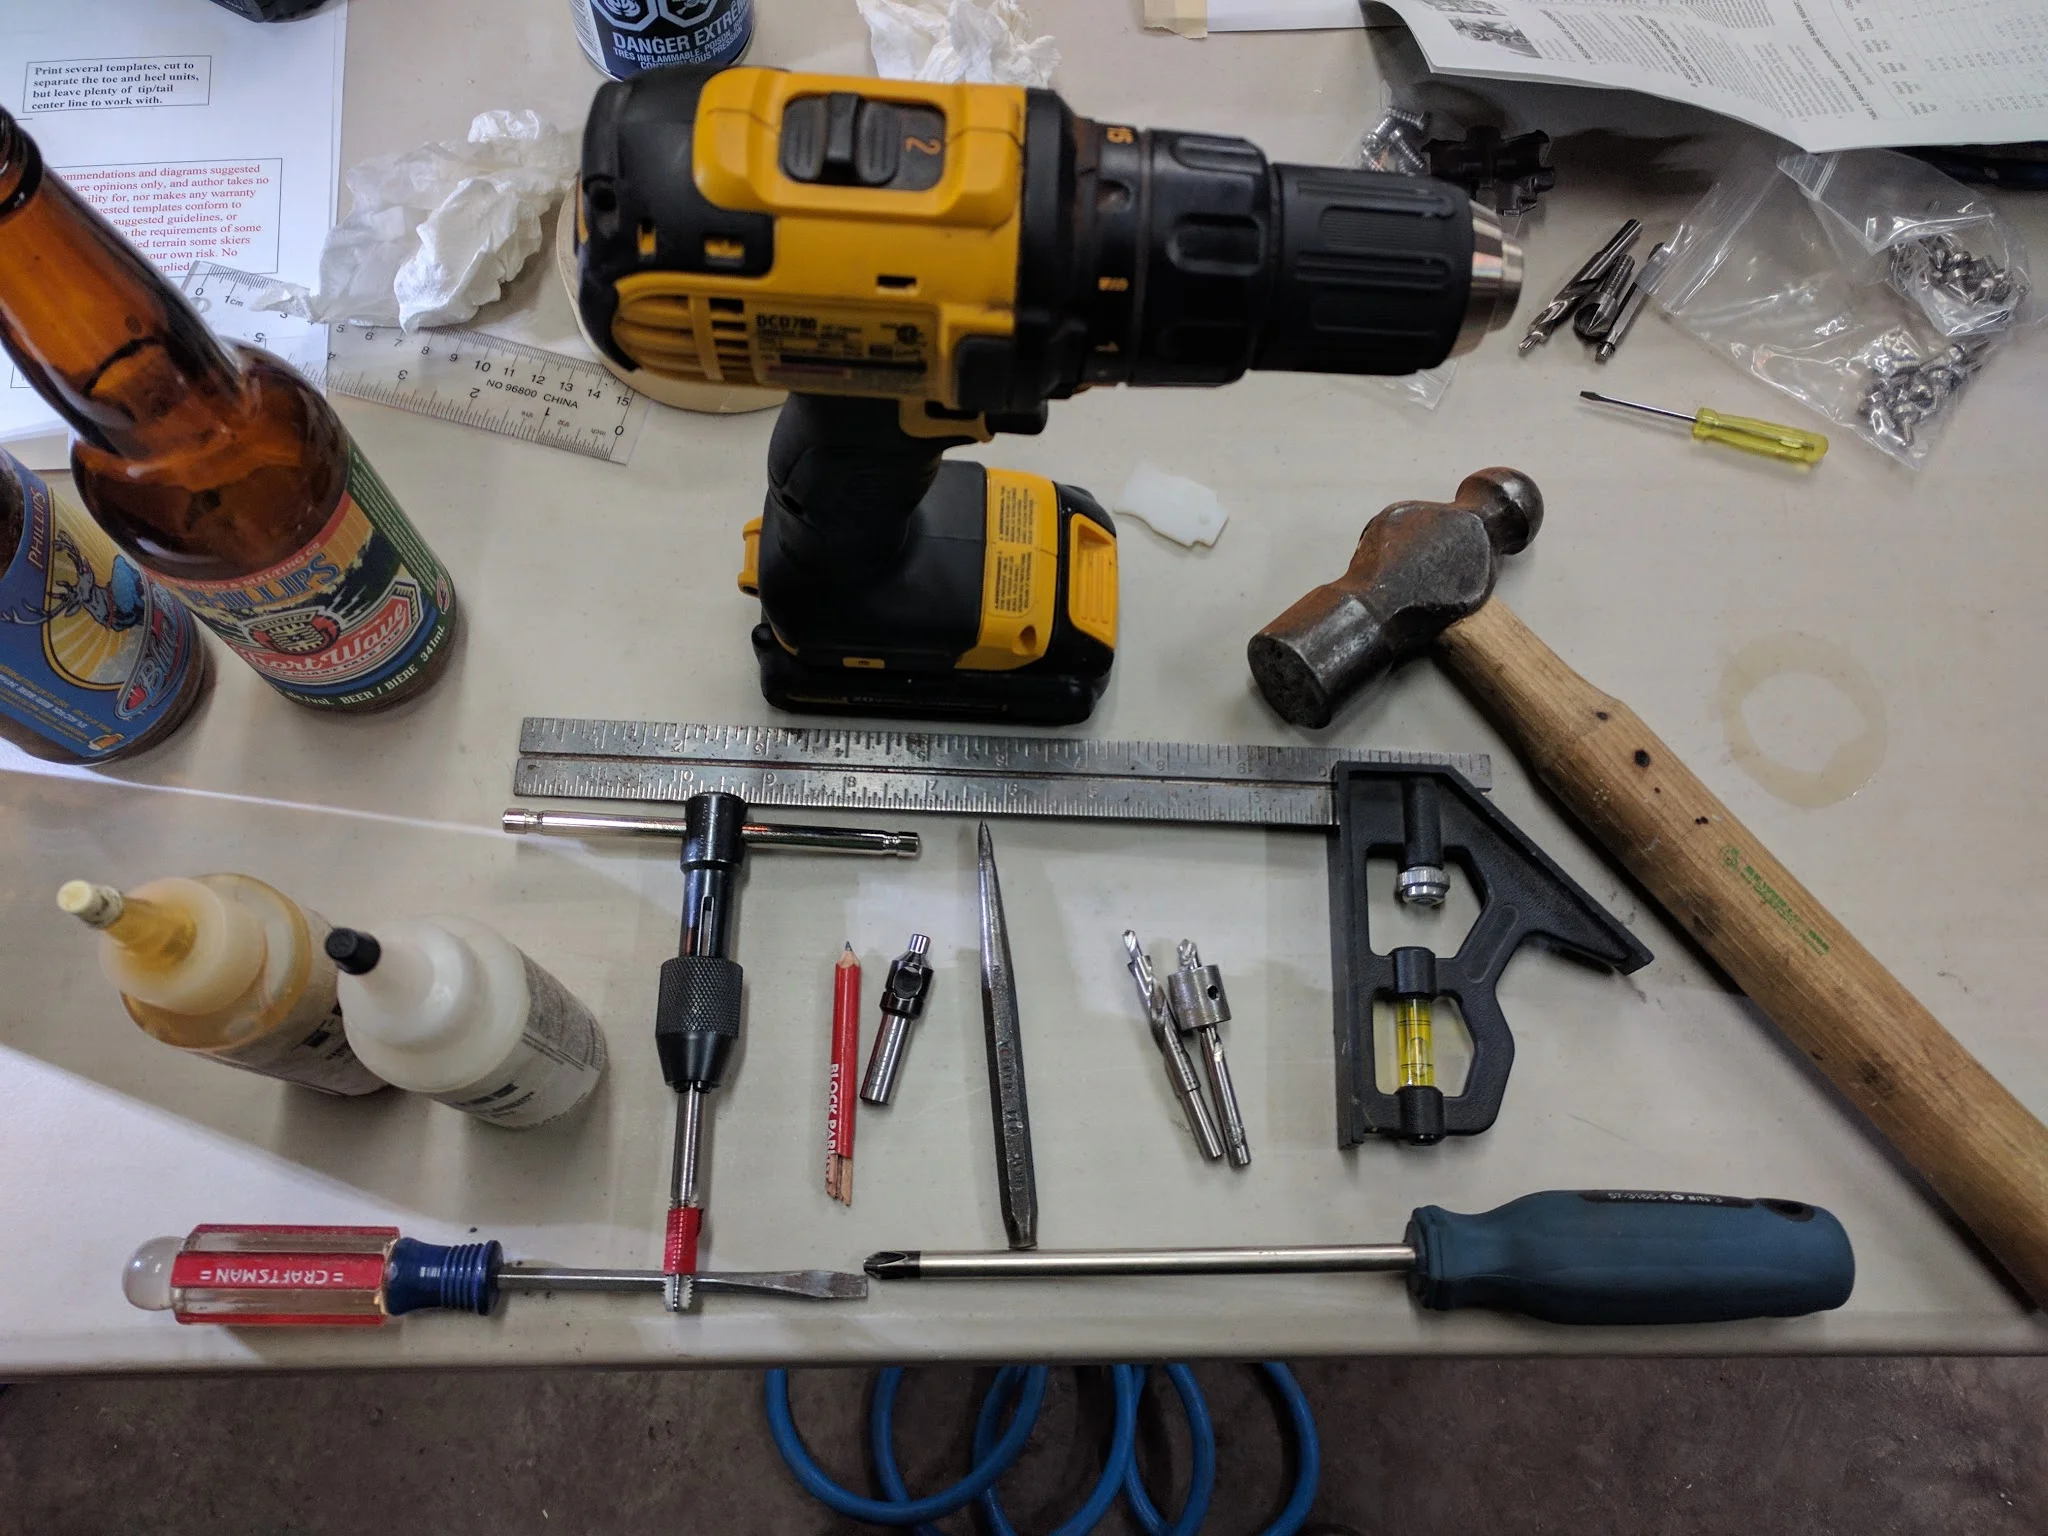
Tools of the trade
Step 1: Find a template
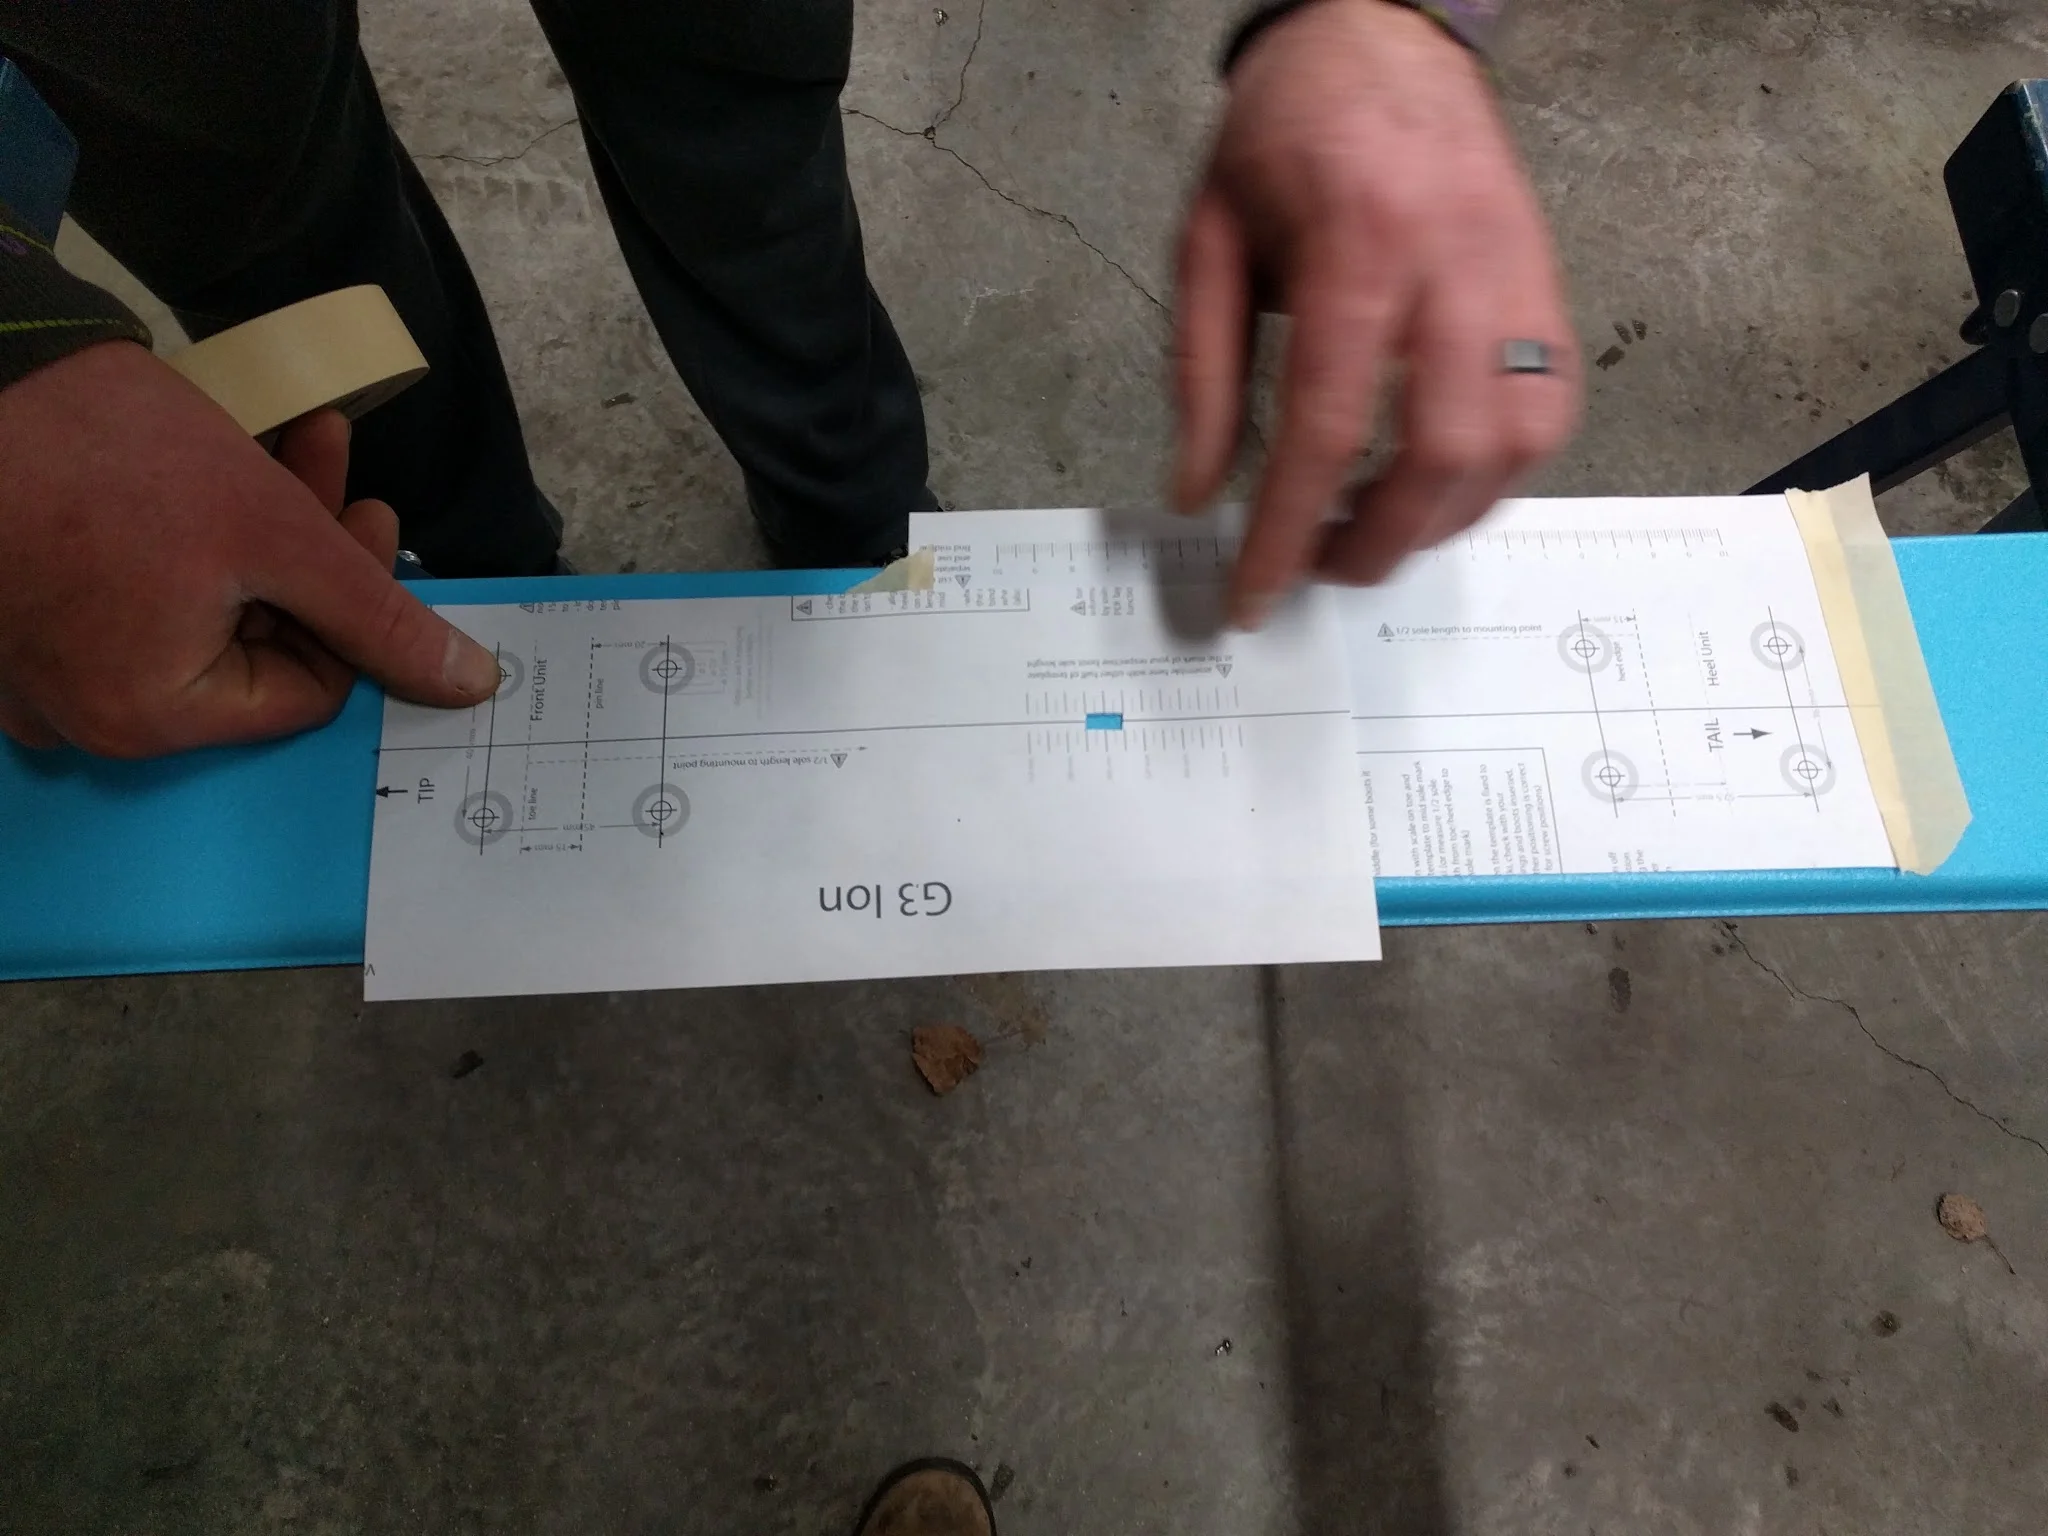
You can find mounting templates for most bindings online. Personally, I really like the ones from PowderGuide – they’re easy to use since the two halves of the template attach with tape to make sure you have the boot sole length right and everything lined up.
We found the template for the binding I was mounting (G3 Ion) and printed it off.

Find the right paper template.
We needed to make sure we got the scale right when printing, so we placed the bindings on the page and made sure everything lined up. The PowderGuide templates also have reference bars you can measure to make sure you have things properly to scale.

Make sure it's to scale by lining the binding up over the holes. Everything should line up perfectly.
Step 2: Trim the template
As is, we had two sheets of letter paper. Time to trim it down. We trimmed side to side and also cut out a window at the right BSL that we could line up with the reference line on my ski that we were mounting to (this can be mid-point or +1 or whatever) – it’s a good idea to measure these off the ground with a measuring tape to make sure your top sheet isn’t mounted wonky.
With the little window cut into both the front and back half of the template, we taped the two halves together so everything lined up.
Cut windows corresponding to boot sole length and start roughly lining things up
Step 3: Find the centerline
Most skis have a reference mark for the mid-point of your boot, but very few have a centerline, so we needed to find a couple of mid-points.
Using a square, we measured the width of my ski around where the front of the binding template was going to end up. From there we just had to divide by two and make a small mark with a pencil. Big enough that we could find it, small enough that I wasn't messing up shiny new skis.
We then flipped the square and measured everything from the other side, there should be NO discrepancy.

Find the centre line - measure from each side, your calculated mid-point should work from each side, if not, you fucked something up. Find out BEFORE you start making holes.
Next we did the same thing for the back half of the template.
With the centre of the ski located, we could line the front and back of the template up with the centerline markers and line the window I cut up with the boot mid-point line (I went for a neutral mount on this setup, but you can use +1 or whatever works for your personal binding mount philosophy).
We taped everything down to keep it from moving around and then re-checked Every. Single. Thing. I'm about to drill holes in brand new skis. Measure twice or buy skis twice, I know my choice.
Step 4: Mark the holes
I used a punch and a hammer to punch divots into the topsheet. This showed us where to drill after we removed the template and also helped keep the drill bit from wandering – for this reason, I wanted to leave a pretty good divot. It hurts to wail on your ski, but better that than end up with a hole that’s off.
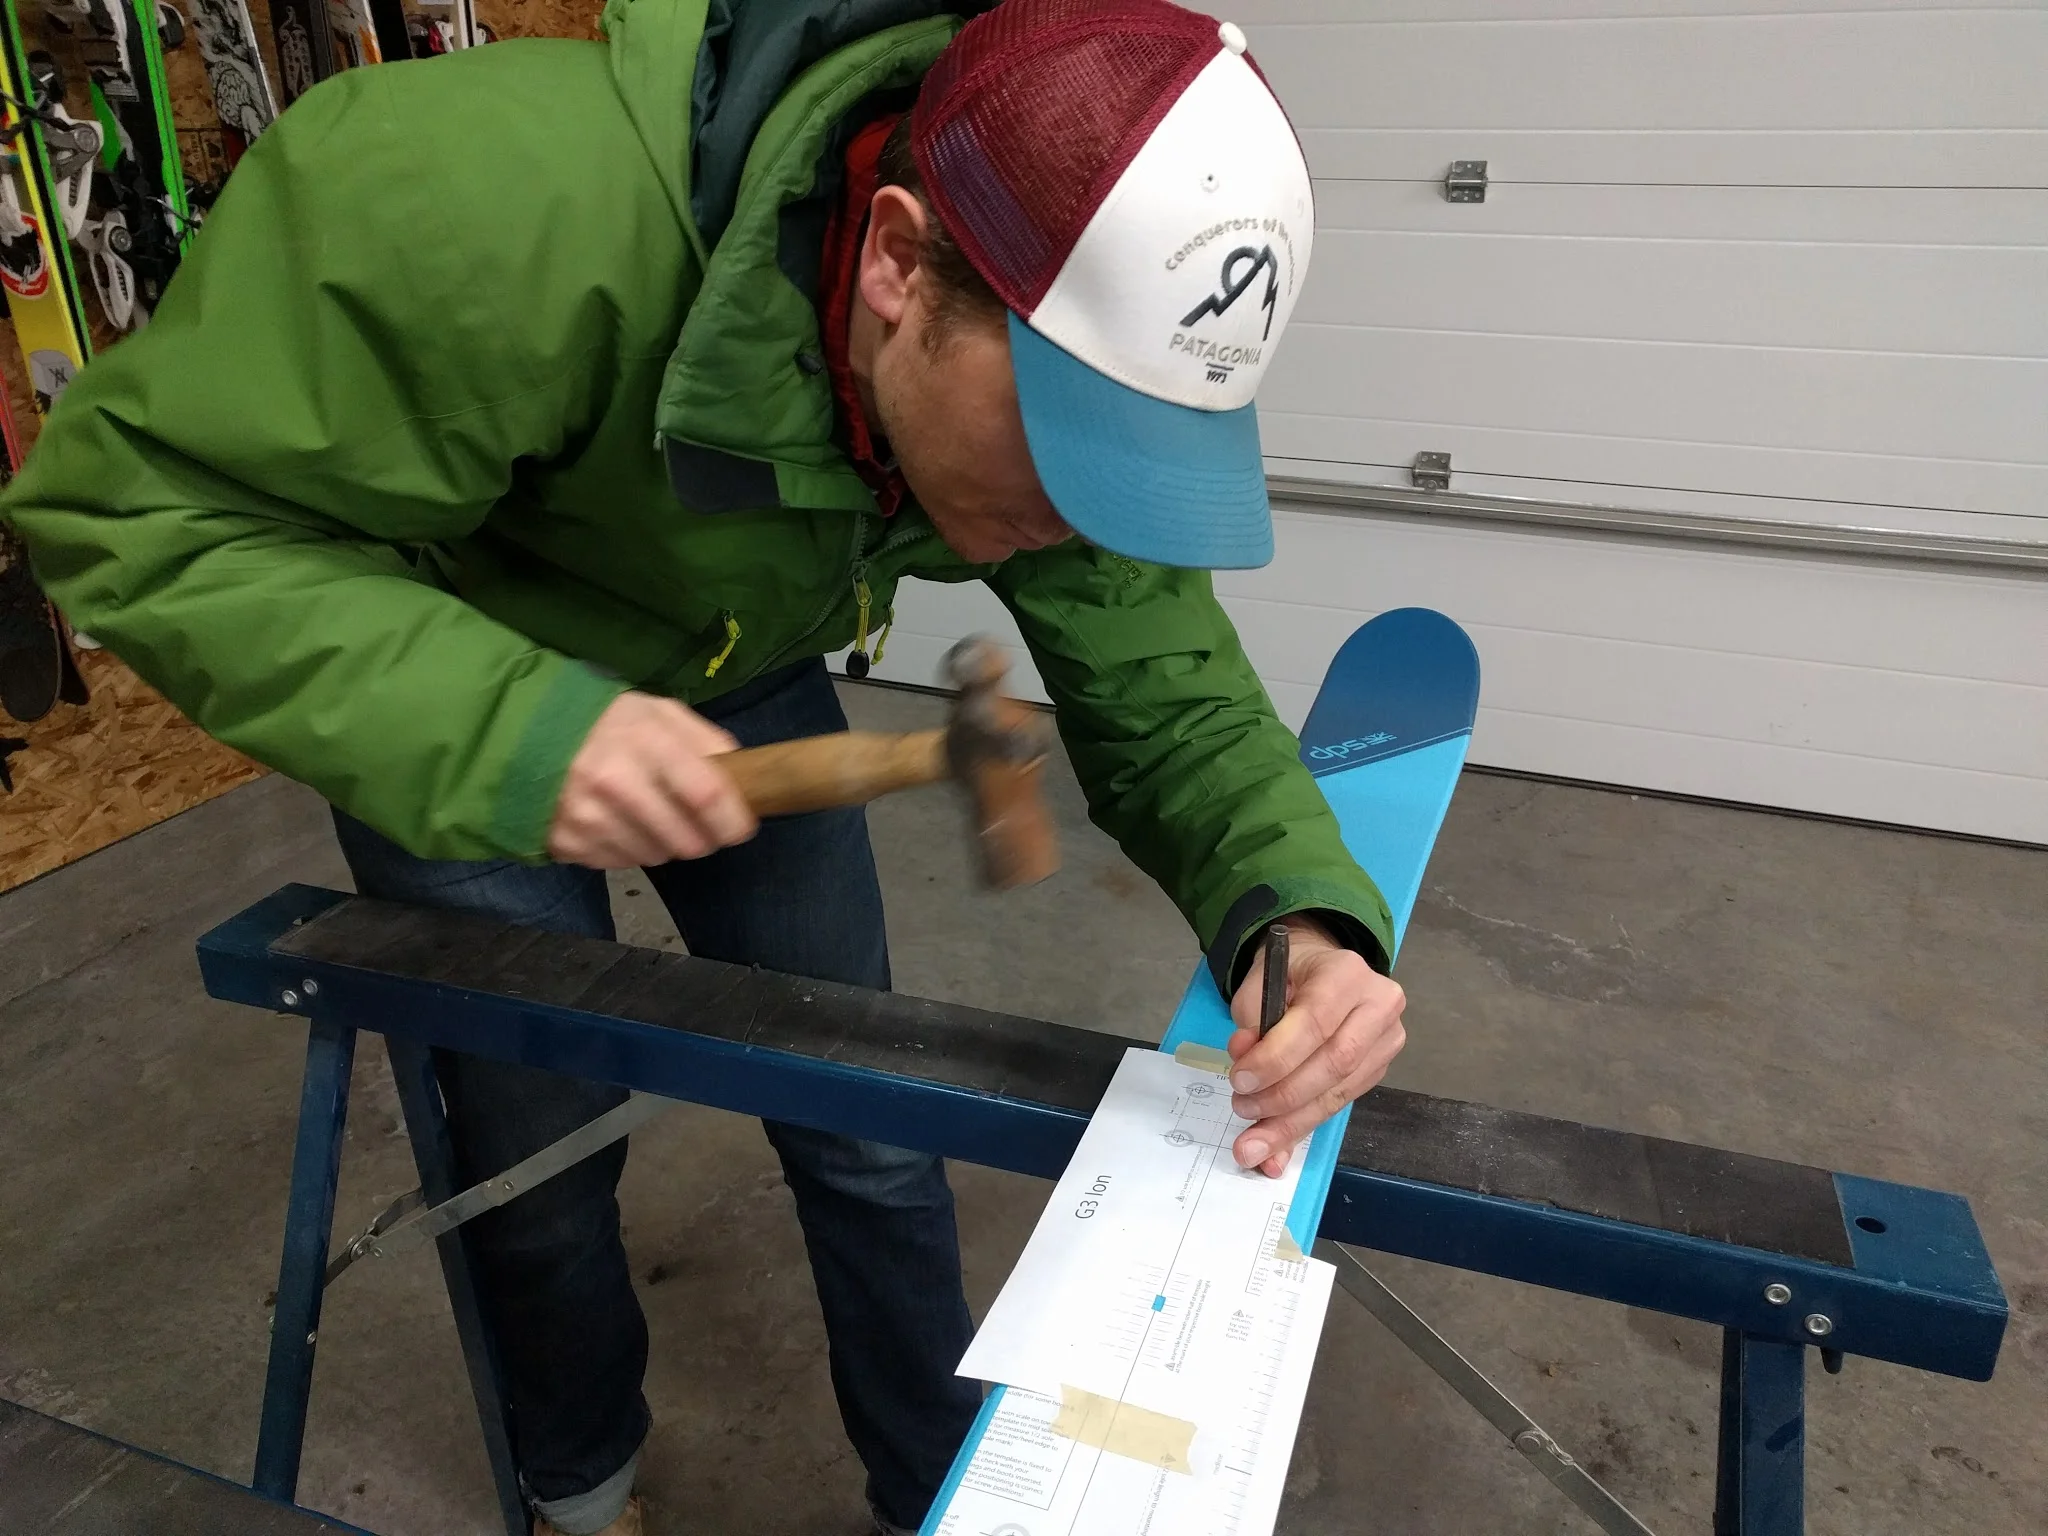
Making some divots with the punch and a hammer. Freaking out slightly.
Step 5: Really double check
Seriously, this was our last chance. We double checked everything. We sat my bindings on my skis – do the divots line up with all the holes? Perfectly? Is everything centred side to side? We made sure that everything looked perfect.

Is everything 100% square and even side to side? If not, now is the last chance to fix it...

Placing the binding on top and sighting down the ski - is everything even? We triple checked that everything looked perfect.
Step 6: Drill
This would have been easiest with a drill press, but if since we didn't have one we did it by hand with a bit of help. The key is the person drilling can see one axis - forward/back or side to side – they make sure one is straight, the other person makes sure the other is straight. You don’t need to be perfect – just as close as possible.

Started with the small bit, as it would wander less and was easier to keep straight. Tried to not poop myself.
Using the smaller stepped bit or a bit with tape on it, we drilled nice vertical holes.
Using the larger bit, we did it again. Doing it in two steps made it easier to get nice clean, vertical holes.
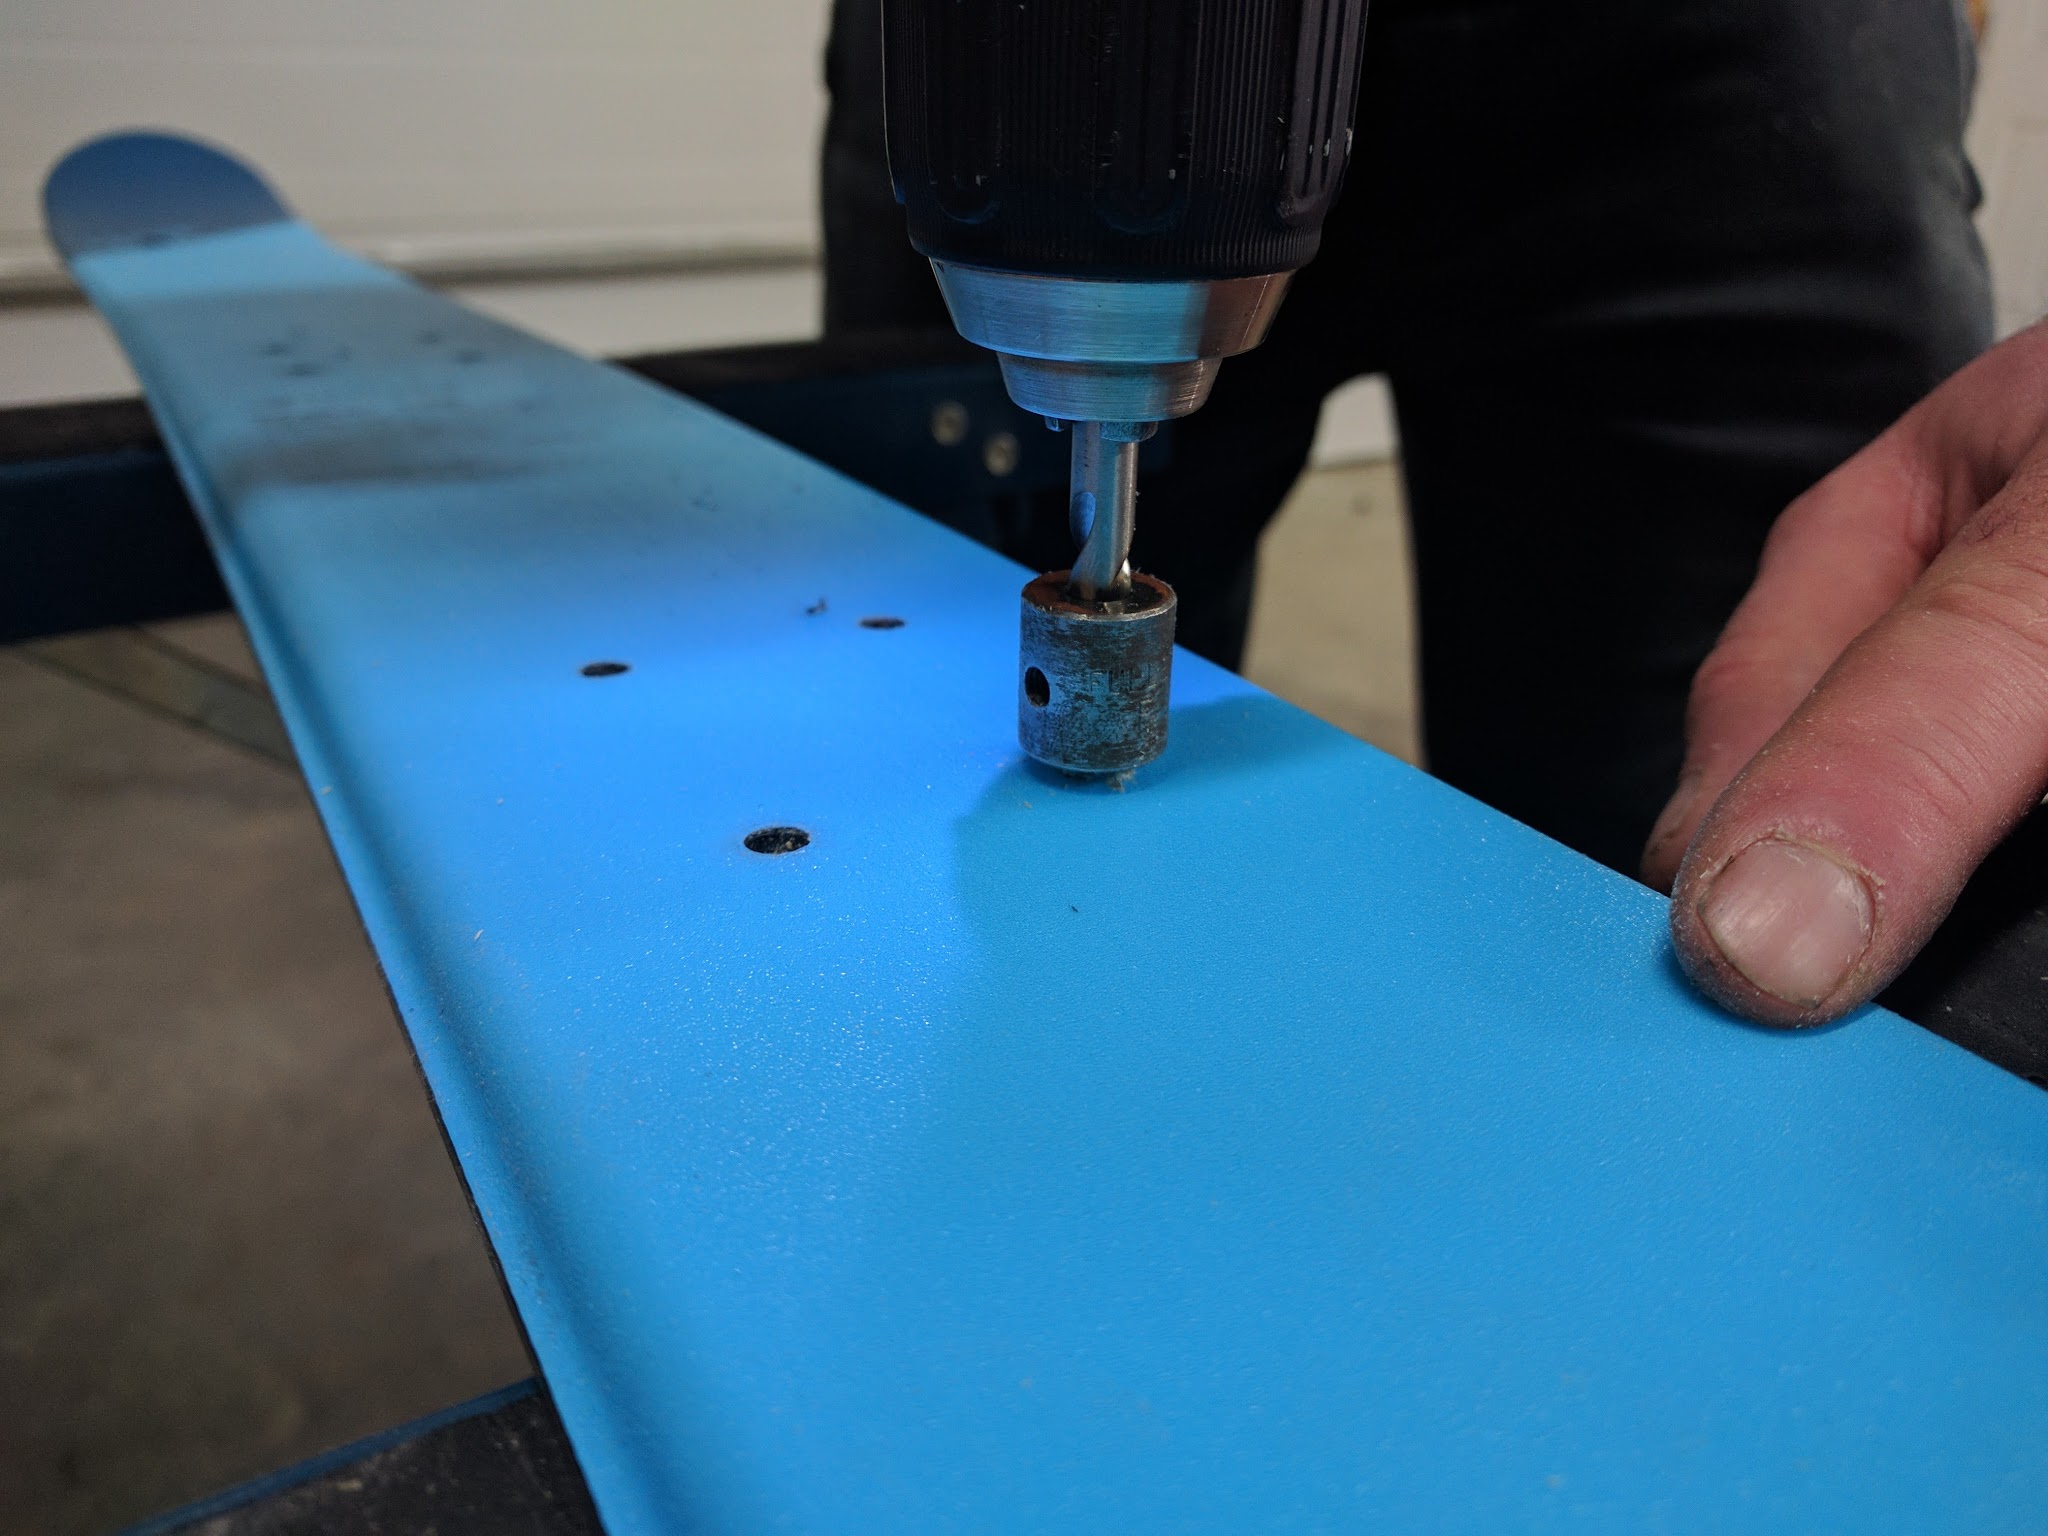
Using the bigger bit to bring the holes up to size. The bits from Binding Freedom look a bit different.
Step 7: Clean the holes
Using a de-burring tool (if you don't have one, you can use a big honkin drill bit held in your gloved hand), we de-burred the edges of the holes. We wanted to clean up the holes and remove any 'volcano-ing'. Using compressed air (bike pump or electronics cleaner would have worked fine) we cleared any debris from the holes.
Step 8: Tapping the holes
This is the most critical step and if you're going to try this, it's worth practising a few times on a scrap piece of wood before you go at it on an expensive set of skis.
We carefully lined up the tap ensuring that it was nice and vertical. We tapped the holes until we bottomed out the tap and then backed the tap back out.
Carefully tap the holes. It's hard to see, but we taped the tap to keep from driving it too far
We cleared the holes with compressed air and ensured everything looked nice and clean.
Step 9: Installing the inserts
We mixed up some epoxy on a sheet of cardboard.
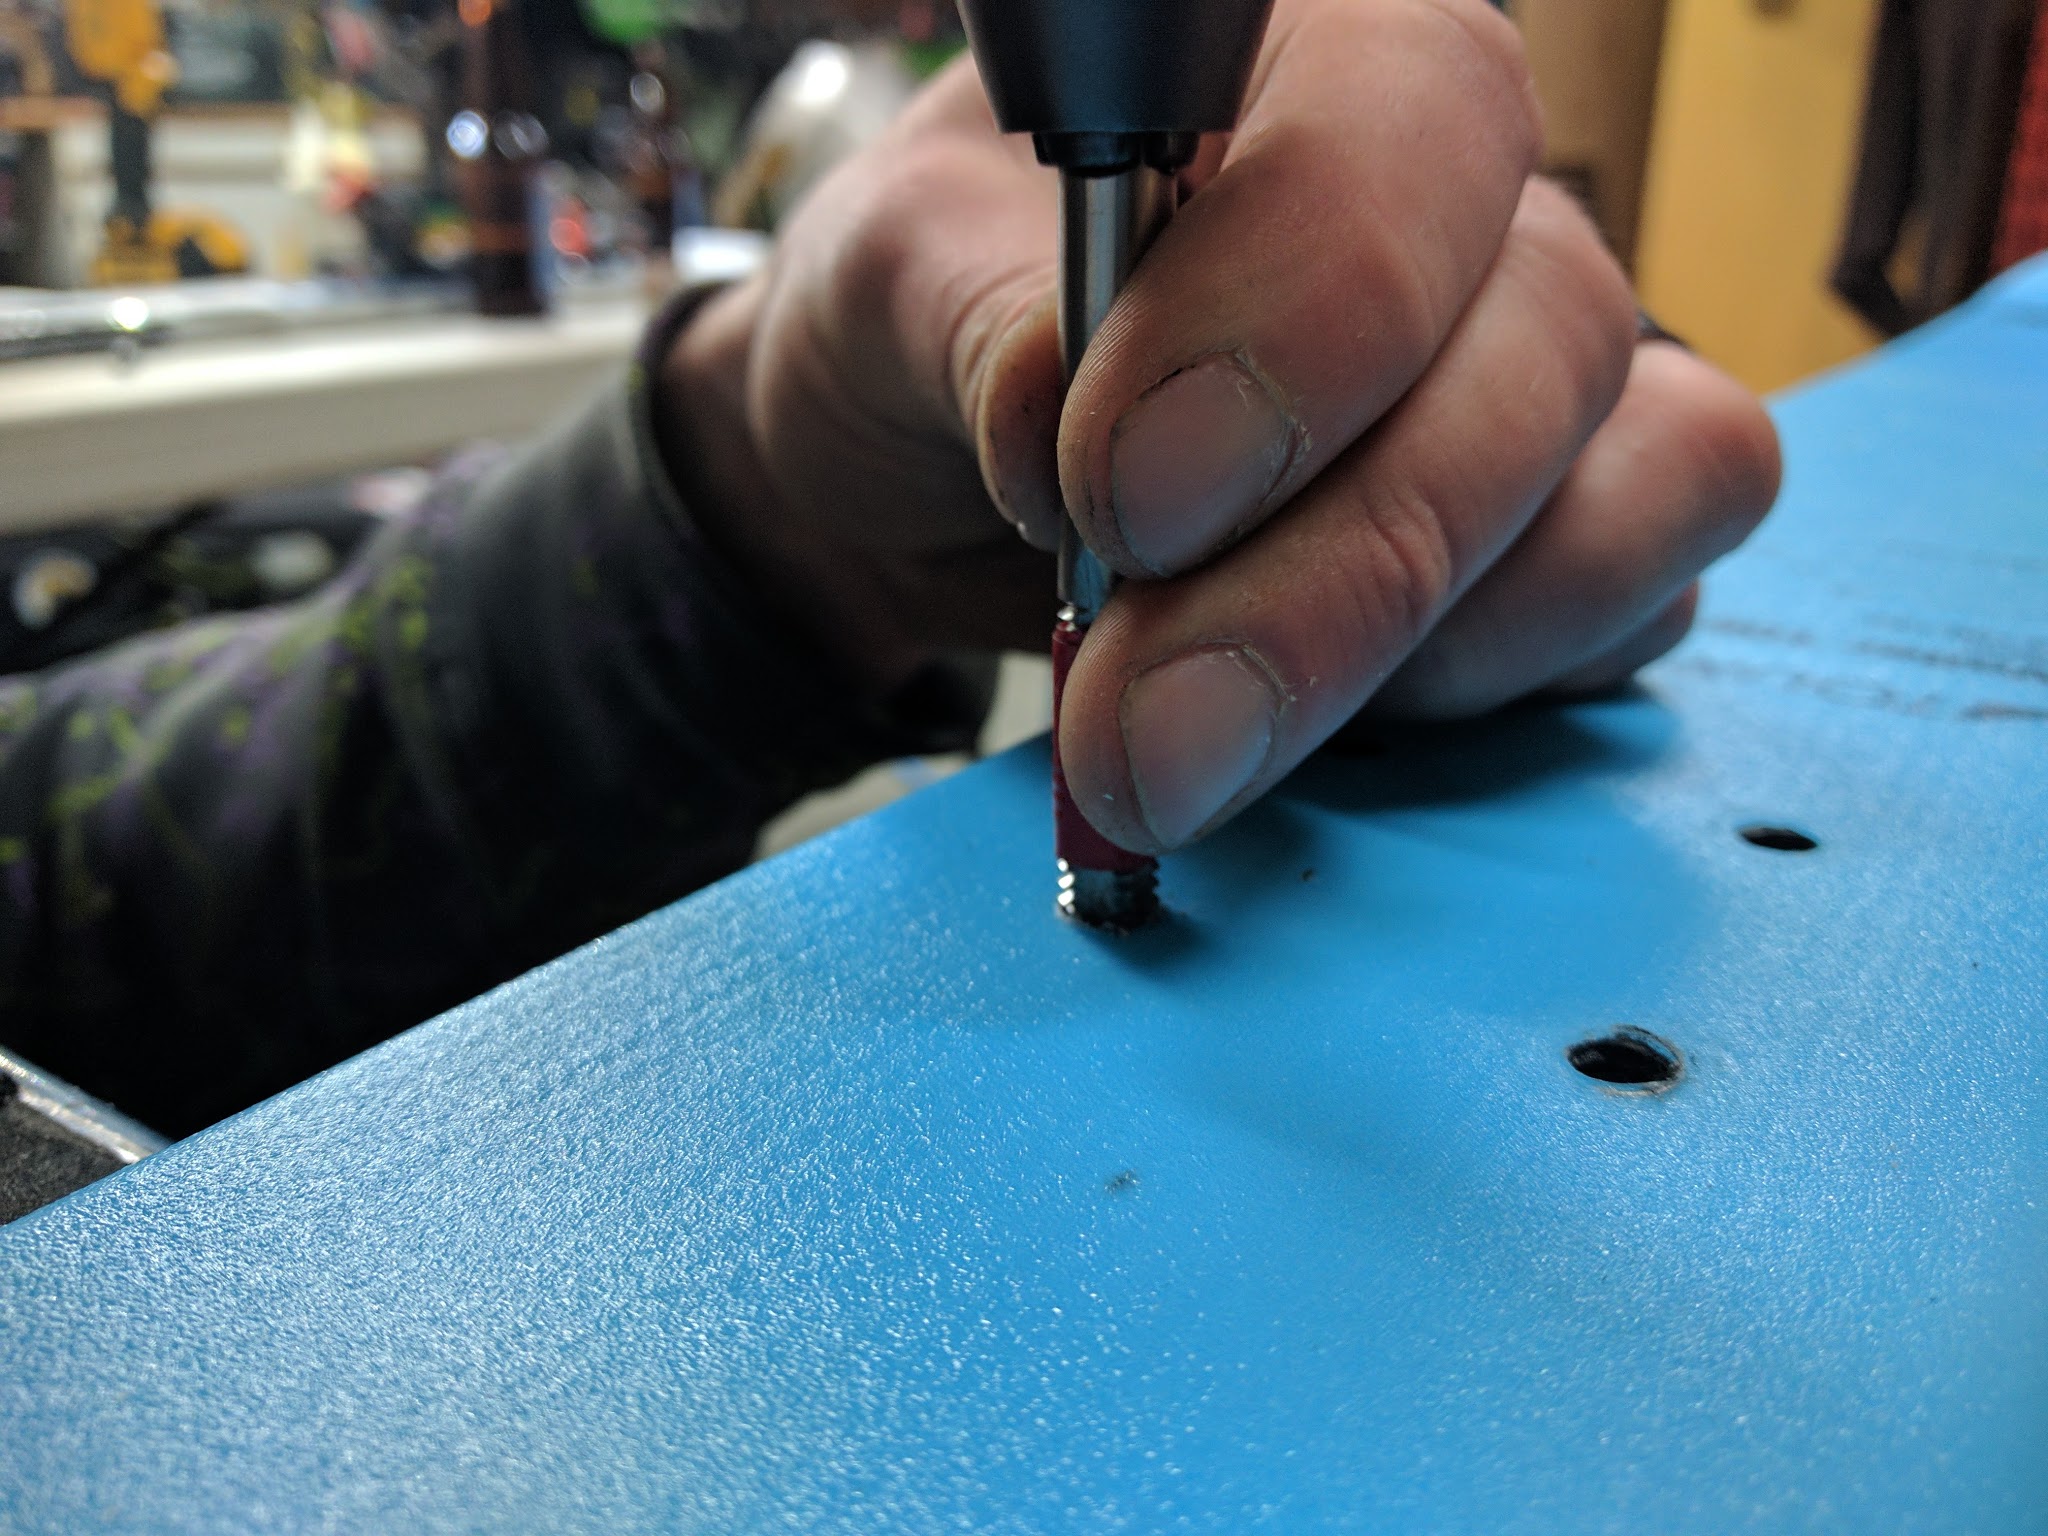
We used a cotton swab to generously coat the inside wall of one of the holes. We then installed the insert. Since we didn't have the fancy insert driver we did it by first inserting one of the screws all the way into the insert and then using a pozi drive bit to screw the assembly into the tapped holes.
Applying epoxy to the holes. More is more.
We then installed the inserts all the way, but didn't torque them down.

Using a bottomed out screw and a pozi drive bit probably worked better than the fancy insert driver
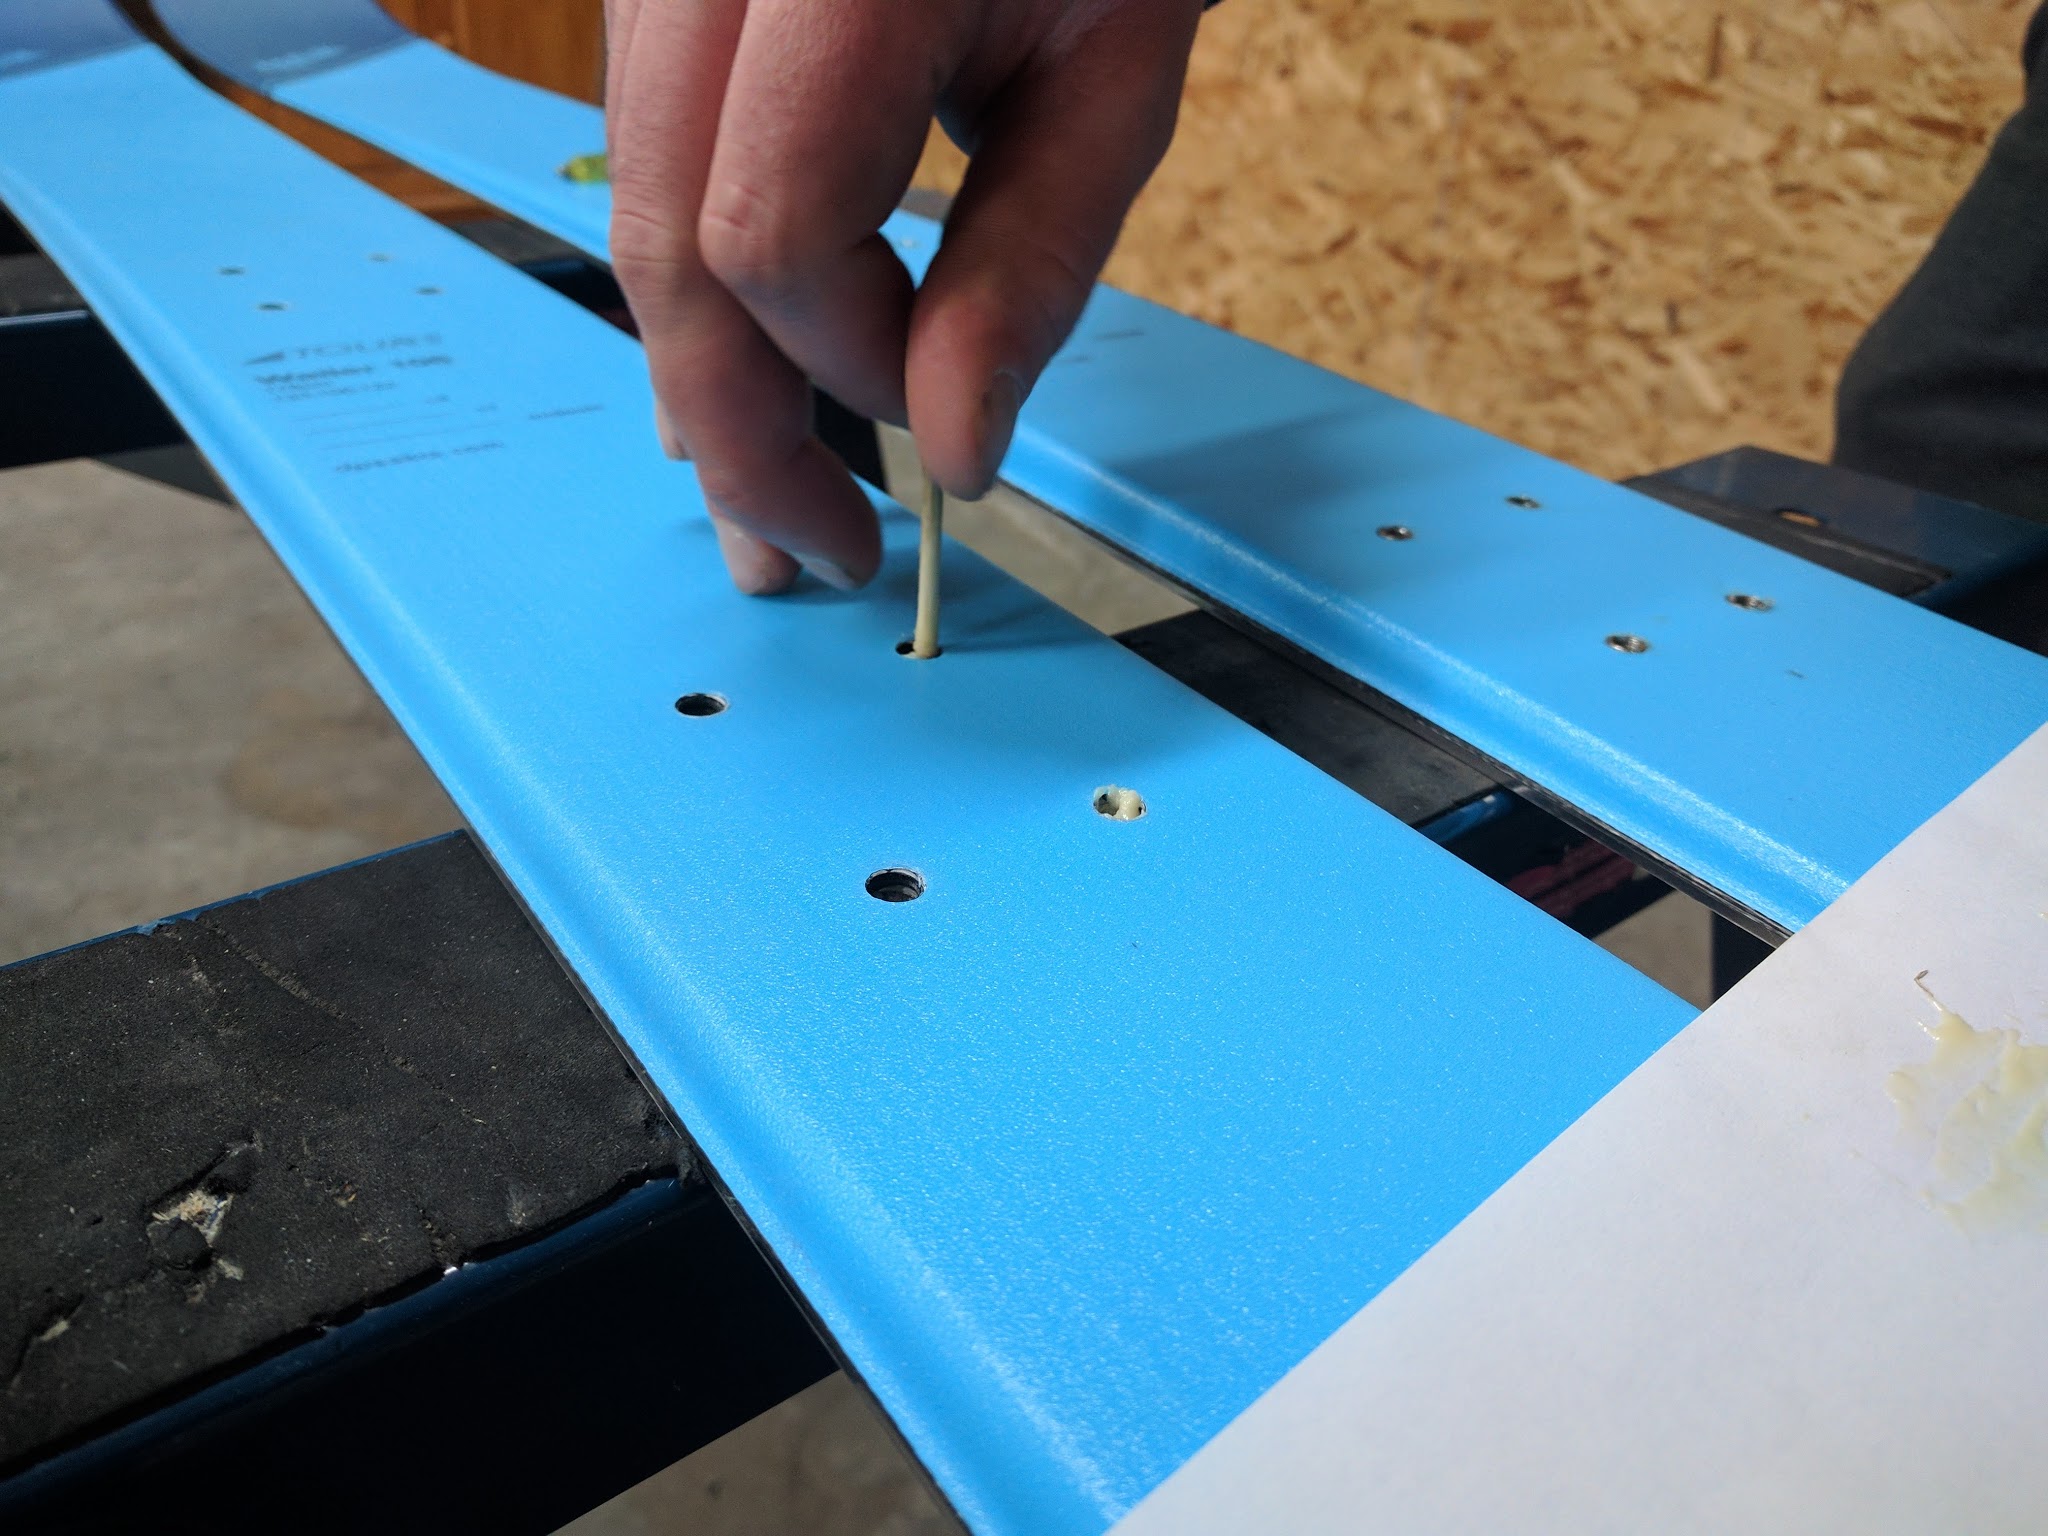
We had some excess epoxy spooge out and wiped it away with a cloth before it got too tacky.
Step 10: Loosely install the bindings
Once all the inserts had been installed, we loosely installed the bindings. We didn’t want to toque things down too much – that can cause some epoxy to spooge out and weld the bindings to the ski. The idea was to use the bindings to ensure that all of the inserts were properly lined up while they still had a tiny bit of wiggle to them.
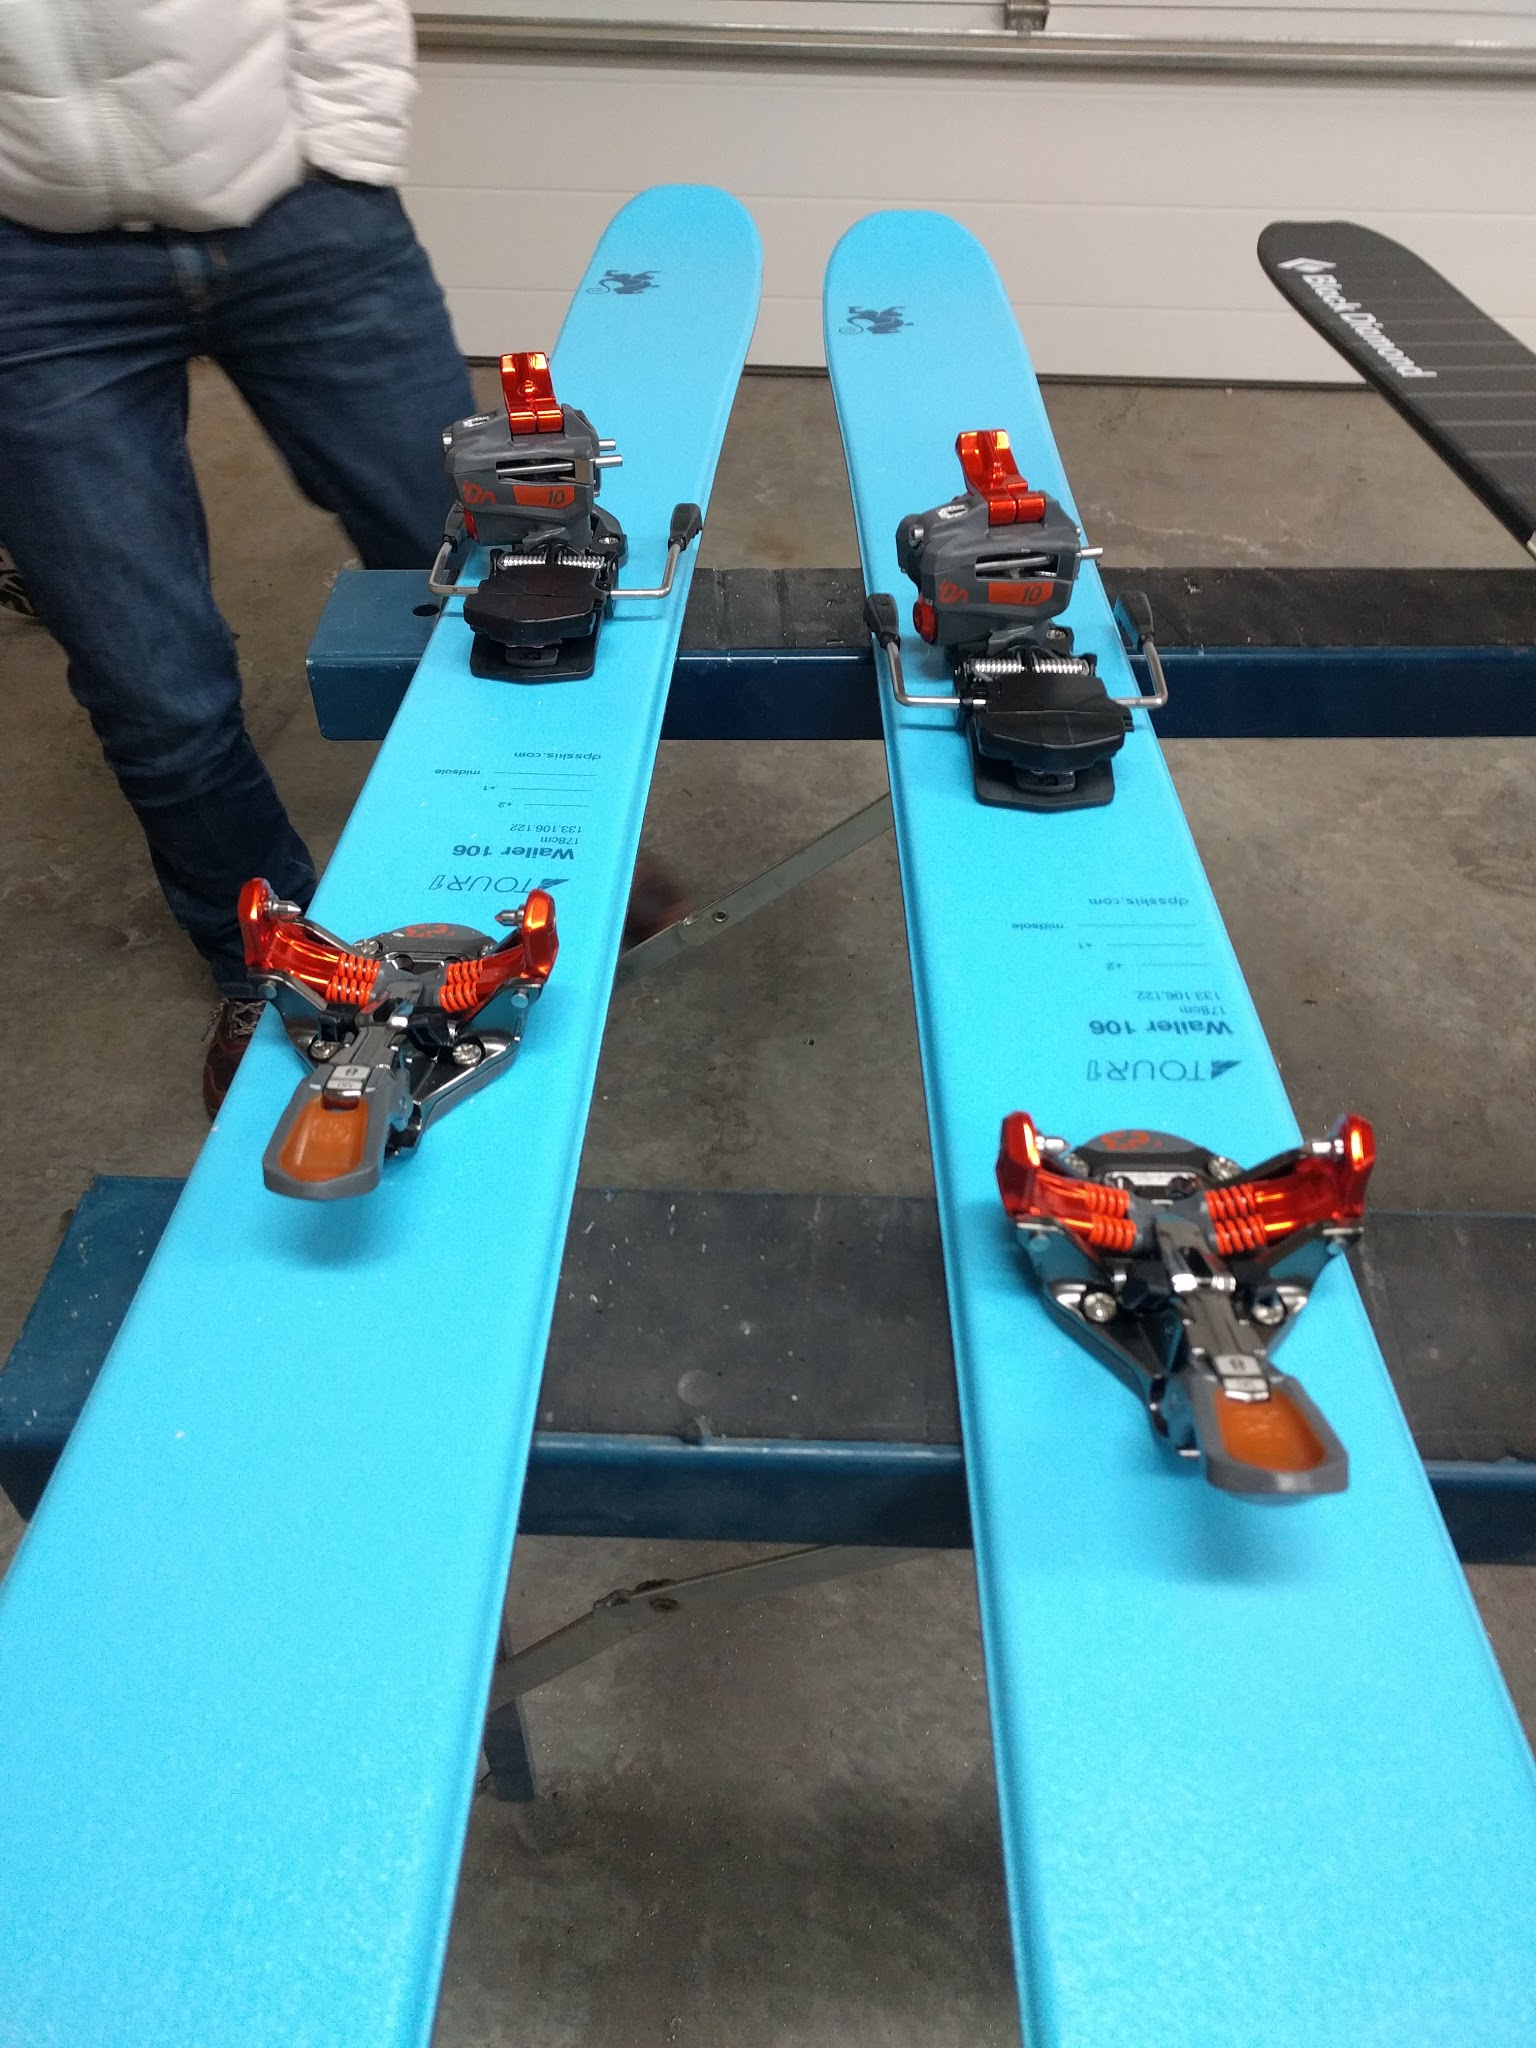
Loosely installed the bindings. It made sure everything was more or less where it was supposed to be and roughly lined up.
Step 11: Go get a beer
If you choose to install your own inserts, the scary stuff is all over so have a beer, you deserve it.
One thing we had to make sure to do was let everything cure for a couple of days and then to apply some Loctite to the screw threads and torque everything down.
I've now logged a bunch of days on this setup with no issues. I snug things down periodically because I'm paranoid, but nothing has come loose yet.
I now have a setup where I can swap bindings between skis and thanks to the increased surface area of the inserts, the whole assembly should actually be stronger than a traditional mounting job. The added weight of the inserts is pretty negligible, so it's a pretty easy win.
Thanks to Kyle Milino for his invaluable help in getting my inserts installed.
Grumpy, cantankerous, wildly opinionated and so much more! Getting really tired on skis is what makes me happy.


